
Eventective’s Agreements tool allows you to easily create and send agreements, such as proposals or contracts, to your prospective clients. Whether you add prospects from your own sources or field requests from Eventective users, the Agreements functionality simplifies your process.
Prospects
Prospects can be generated from the following:
- Referrals: Direct event requests from prospects who are interested in your business. Learn more about Referrals here.
- Leads: Event opportunities in your area. Learn more about Leads here.
- External: Added manually via the +Add an Event feature.
- Your Website: Added via our embedded or linked inquiry form. Learn more about our Inquiry Form here.
External
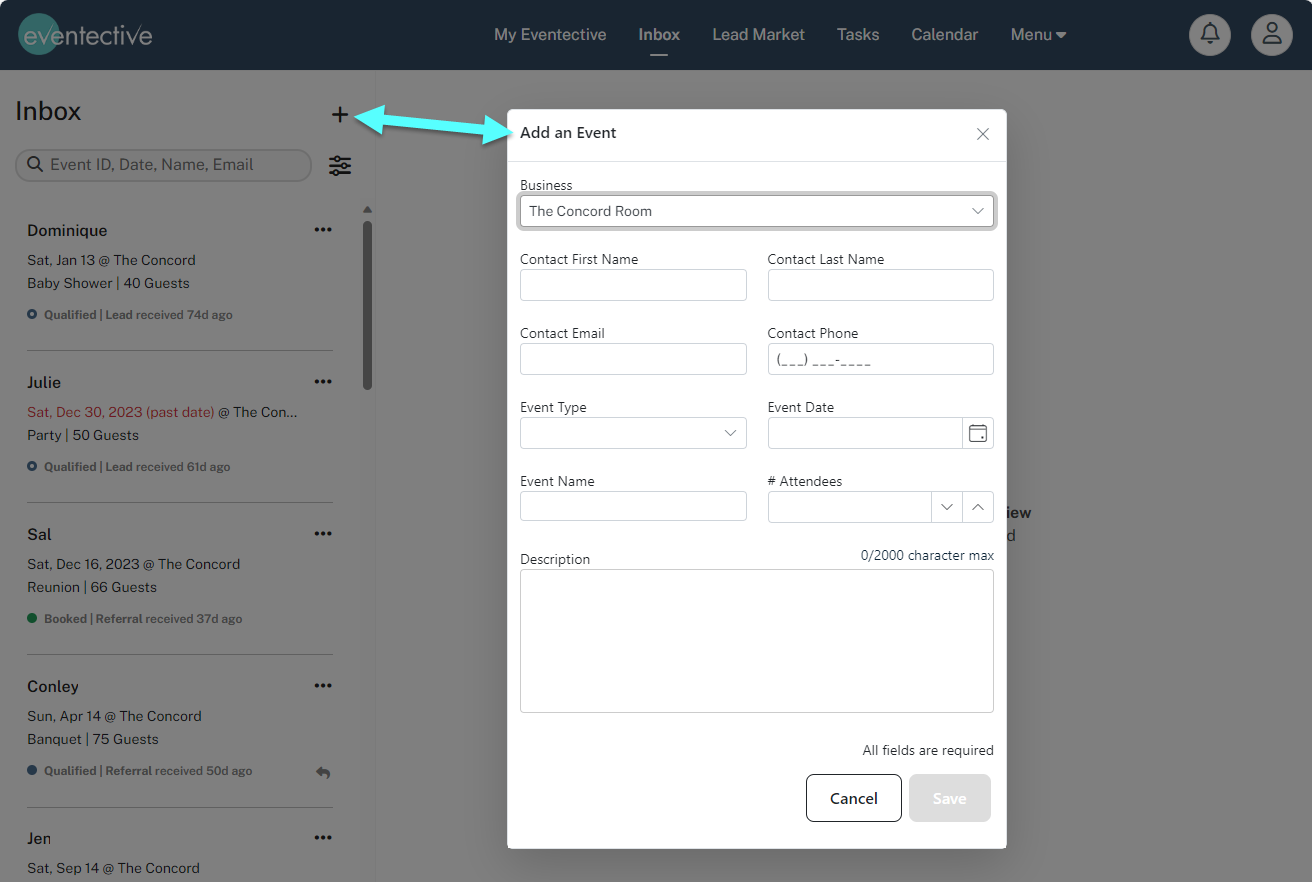
To manage event business generated outside of Eventective, use the Add an Event feature – the plus (+) icon – at the top of the Inbox list. Once you have created the event, it will appear in your Inbox.
Your Website
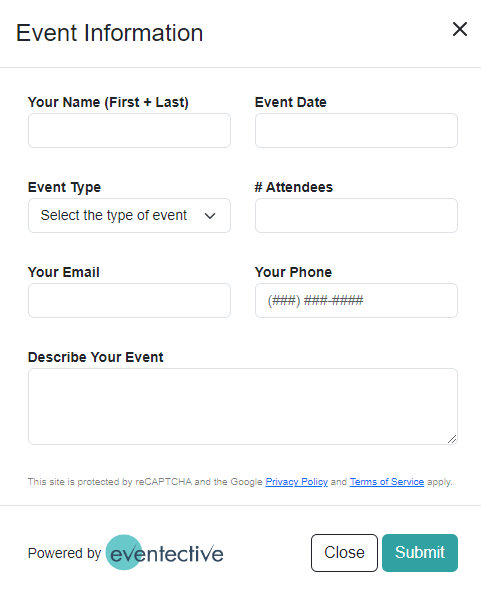
Prospects can also be captured directly from your website with an embedded or linked event inquiry form powered by Eventective. By default, the inquiry form will include the following fields:
- First and last name
- Event date
- Event type (wedding, party, meeting)
- Number of attendees
- Email address
- Phone number
- Description of your event
Create an Agreement
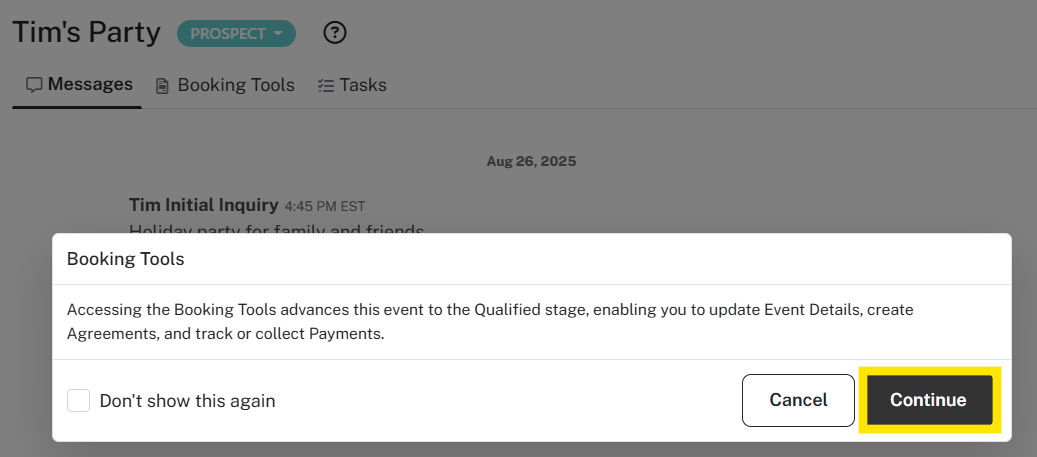
To create an Agreement, select any event in your Eventective Inbox. Then, click on the Booking Tools tab to automatically promote your event to the Qualified stage.
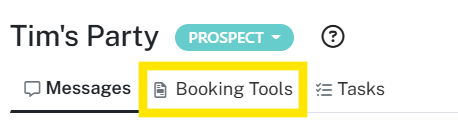
This enables you to update Event Details, create Agreements, and track or collect Payments.
When you have identified a potential client interested in using your event services, simply move your Prospect to the Qualified stage and begin building your event agreement.
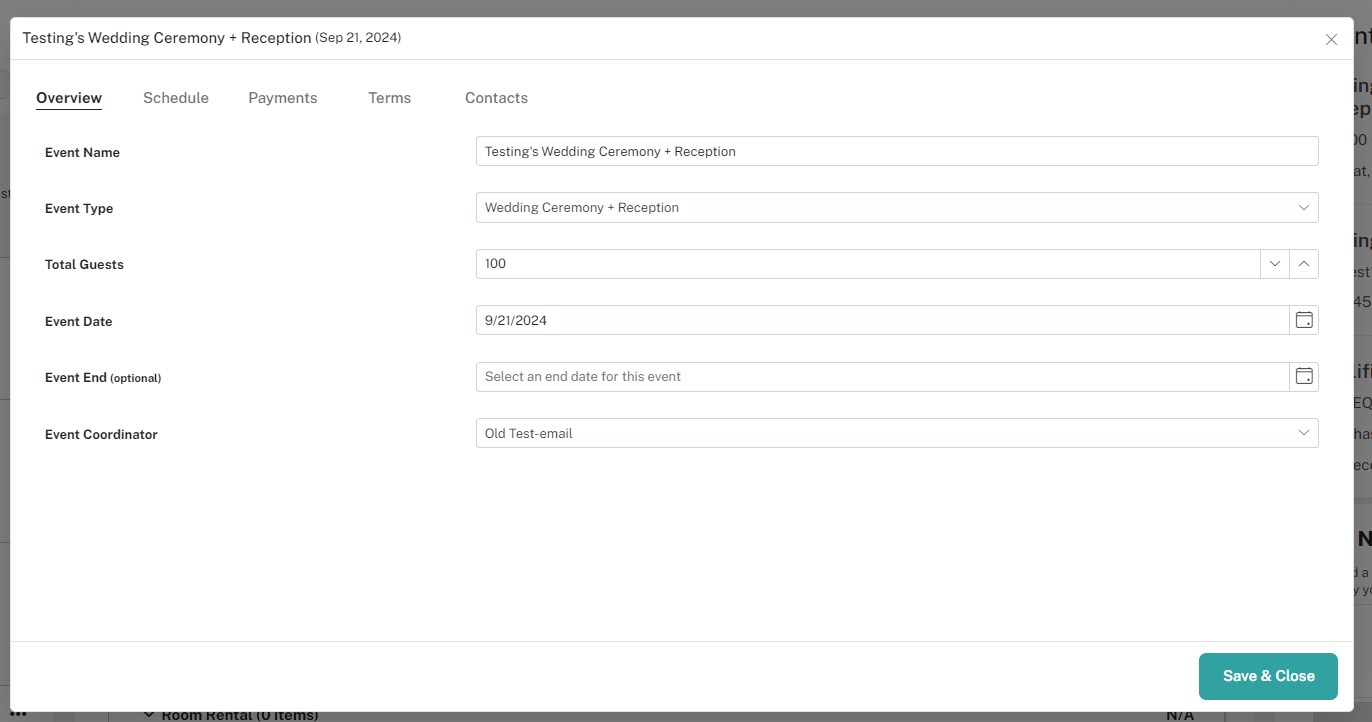
Details
Once you open the Details tab, the data from the initial client request is imported as your Event Overview. Make any necessary changes as your client negotiations evolve.
Edit the event name, guest count, and event date, if flexible. All these details will appear on the Agreement.
Schedule
The Schedule section allows you to set up the event schedule and fully outline the event costs.
Start by editing each function to set proposed start and end times, identify the function space to be used, and define when the client can access the space for setup and breakdown.
If the event consists of multiple functions, such as a Wedding Ceremony and Reception, you can break them out into separate sections with their own pricing structures.
The Manage Items functionality defines the pricing structure for each function. Create line items for Room Rental, Food & Beverage, Rentals & Service Personnel, and Fees & Gratuities. Or define your own categories.
Function Items will be displayed in the Agreement and will provide you with the opportunity to fully outline the event costs.
Payments
Once you have completed the event schedule and pricing structure, manage and request payments via Stripe or Square in the Payments section. Payment schedules will be displayed in the contract.
For any payment, you can include the following information:
- Description (e.g. deposit, initial payment)
- Status (Unpaid or Paid)
- Due date
- Amount due
- Payment reminders
Any remaining balance for the event is shown so you can craft a payment schedule to match your rates and possible changes to the event.
You can also process online payments via Stripe or Square. Learn more in this blog post.
Terms
The Terms section allows you to enter as many Agreement Terms as you like. Terms can be entered individually or as a template. Use Terms Templates when you reuse specific terms for multiple agreements.
In both the Term Template editor and the Terms section in the agreement builder, you can add styling to your text. Bold, italicize, or underline any words or phrases for emphasis.

Terms and Templates support the use of Template Variables for customizing agreement content using details from the client’s event. Review some example Terms here.

You can also add “Initial Here” fields to any of your Terms. Select the pencil icon either in the Terms section of the agreement builder or in your Template Settings to add the field anywhere you require initials.
Here’s an example of how the “Initial Here” field will appear in your final agreement:

Business Logo
To further customize your agreement, you can upload your business logo.
Navigate to Settings > Business Logo. Click the “Browse” button and upload the logo file. Your logo will now be added to the top of any agreement you send your prospects.
Contacts
The Primary Contact information will appear on the Agreement. The email address for the primary contact cannot be changed. Additional contacts may be added for your reference, but they will not appear on the Agreement or receive copies sent from the system.
Send an Agreement
Once you have completed all the details for an event, it’s time to view the Agreement. Navigate to the Agreement Tab to display your draft Agreement. Select Download to save a local copy. Open your downloaded PDF to view it full screen or print it out for review.
Return to the Details tab to edit or update the Agreement if necessary. Once the document meets your approval, select Send Agreement to email an agreement link to your client.
If you expect to receive feedback before finalizing the Agreement, you can choose to send the Agreement with no signature required. But if you are ready to get down to business, select the option to require a signature. In either case, Eventective will notify the Primary Contact via email that they have an Agreement to view.
Once the Agreement is sent, the event will be promoted to the Tentative stage. Additionally, the version of the Agreement sent to the client will be saved on the Agreement tab. As the Agreement changes, each revision sent is stored for future reference.
When the client views the Agreement, you will receive a notification in your Message timeline. If you require a signature for the Agreement, you will receive another notification when the Agreement is signed. Once signed, the event is moved to the Booked stage and the digital signature will appear in the Agreement history.
Duplicate an Event/Agreement
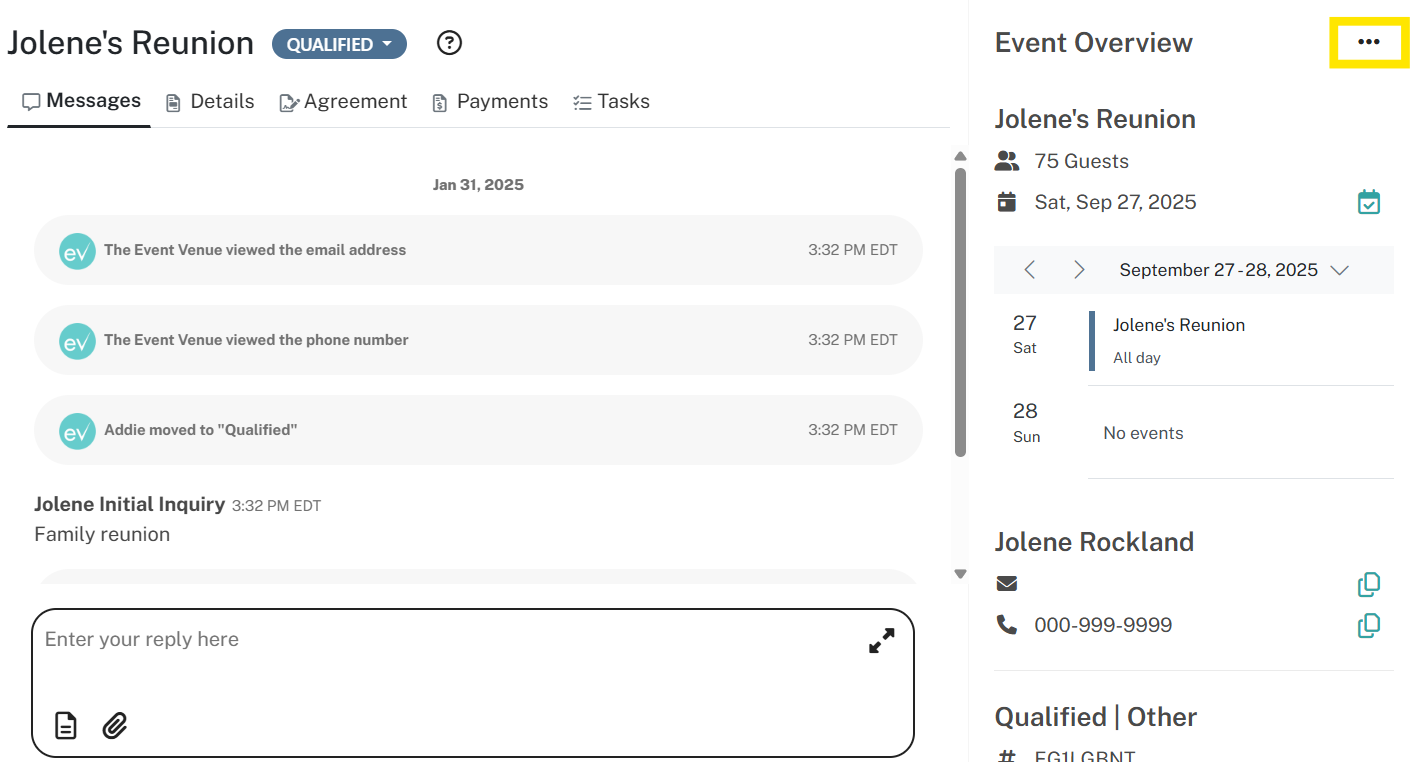
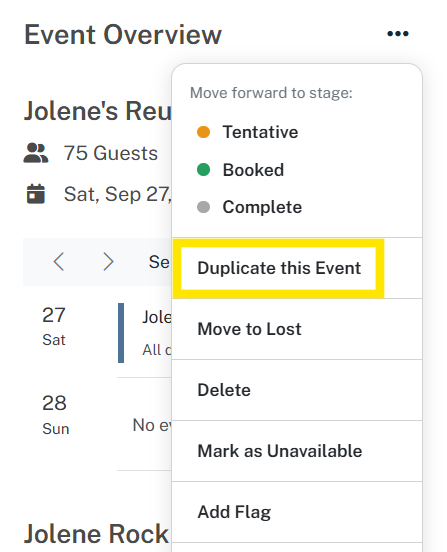
To make your event booking process easier, you can duplicate an existing event. As long as the event is marked as Qualified, Tentative, Booked, or Complete, you can duplicate the event.
Here’s how: From your Eventective Inbox, select the event you would like to duplicate and click the menu icon (…) in the upper right-hand corner, next to ‘Event Overview.’ Then select ‘Duplicate this Event.’
Fill in the duplicate event details, including the new event contact’s name, email, phone number, and event date. Click ‘Save’ when you’re finished.
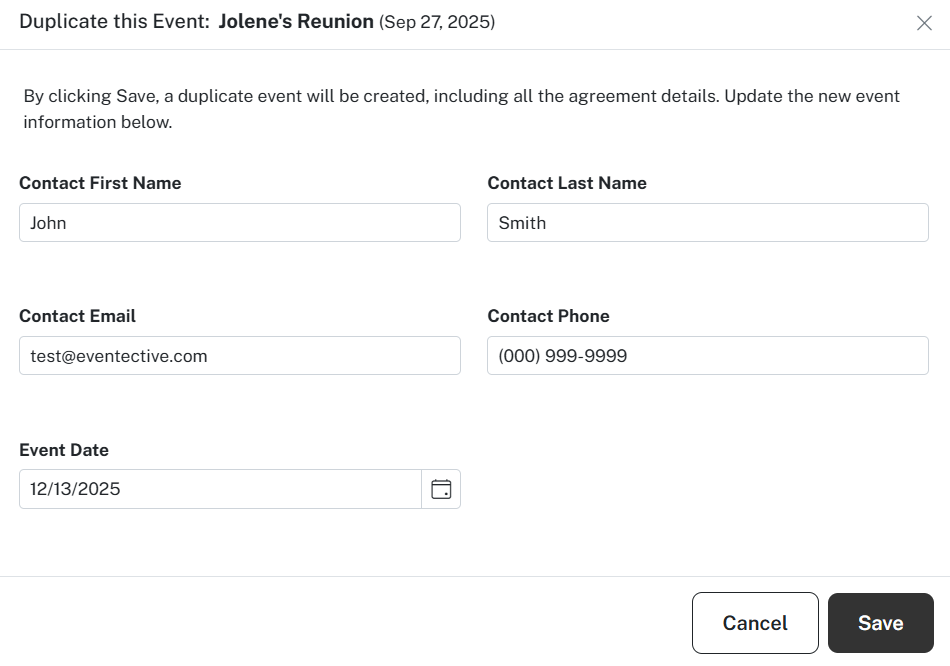
The duplicate event will be created with the same details as the original event: function details, billable items, terms, and payment schedules. Edit any of these sections as you normally would.
Reports
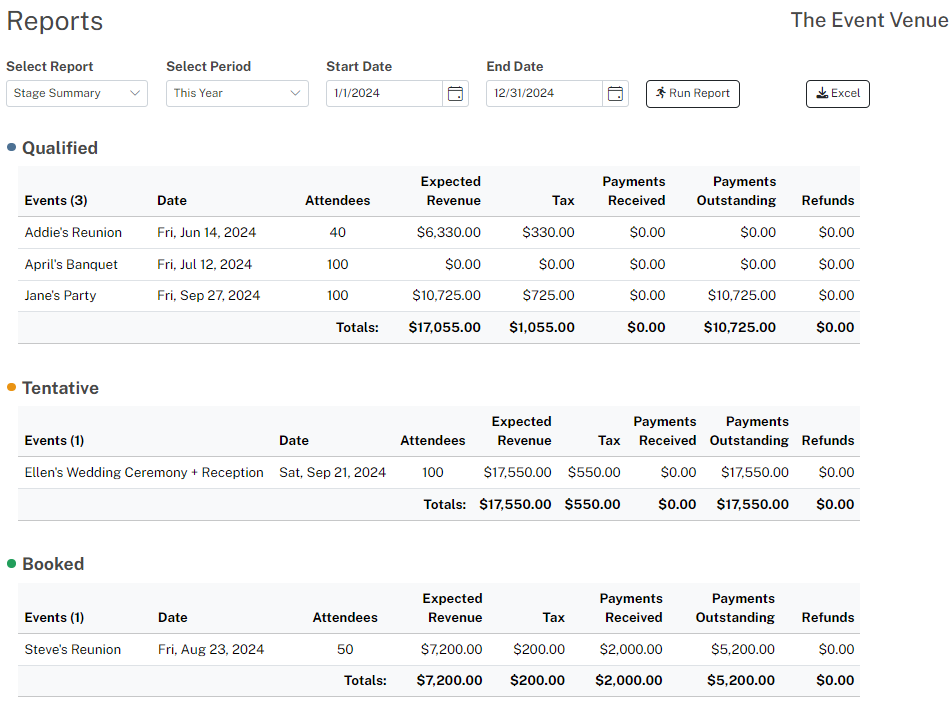
Additionally, you can report on your sales funnel in your Stage Summary Report. View breakdowns of each event by Stage and key details: event name, date, attendees, expected revenue, tax, payments received, payments outstanding, and refunds.
Conclusion
Our new Agreements tool is designed to streamline your entire event sales process from Prospect to Booked. You’ll have everything you need to track your event success!
Want to learn more about Agreements? Watch this video tutorial or connect with your Account Manager for a demo.